Cooking liver: offal isn’t awful at all

The people who knew me in America, when I was at times pescatarian, vegetarian, and flirting-with-vegan, would be low-key horrified, or perhaps morbidly fascinated, if they saw me now.

On market days I stroll through herds of goats and sheep and their Masai herdsmen, squeezing goat flanks and stroking sheep backs to see how much meat they have on them. I barter jokingly with the men and tell them I’ll come back and buy one another day. They always seem to think I need several goats, ASAP, and tell me so.

I eventually pry myself away from the livestock yard and head to the butcher row. Sheep are tethered together at the neck by sisal rope, waiting for their imminent slaughter. Raw meat hangs from the wire mesh in the windows of the butchers. The smell of grilled meat fills the air. Most of the butchers wear white coats, which by the afternoon are pretty dirty-looking.

Today, I hunt down goat liver. I buy half of a raw liver, weighing probably about a pound, for 4,000 Tanzanian shillings – about $2. I head over to another section to pick up soup bones for my friend’s dog who’s staying at our place, then head home.

Being a previous vegetarian who was then transplanted to Tanzania was one of those experiences that may be best described by the phrase “out of the frying pan and into the fire.” Seeing cows and goats being slaughtered in the mornings on my way to the village cafe was something I quickly got used to. I would watch cows being butchered from start to finish. I gained a new appreciation for this type of slaughter: the entire animal was used. Hardly any part was thrown away.

The hides go to a man who buys them up for tanning. The head and feet go to mamas who specialize in cooking various soups with them. A Masai butcher would collect the blood which can be drunk, whereas a Muslim one would let it flow into the ground, which is part of halal slaughter. Stomach and intestines are cleaned, then grilled or cooked. The liver and heart are sold along with the muscle meat at the butcher’s. Everything else is thrown to the village dogs, who make short work of it. What’s left – the horns, maybe? I once told a Tanzanian man that some cultures in parts of the world clean and polish animal horns, then use them as drinking vessels. He was more or less horrified. Guess you have to draw the line somewhere.

I realized that if I truly appreciate this kind of slaughter, and if we will probably butcher our own goat one day, I need to be okay with cooking and eating some of these non-muscle-meat parts that come along with a slaughtered animal. I figured liver was a good place to start.

Many people balk at eating liver because it is the organ that removes toxins from the body. If toxins are a concern, in general it’s best to choose liver from smaller and/ or younger animals; for example, better to eat a young rooster’s liver than an old pig’s. Also, if possible, try to make sure the animal was raised organically; at the very least, not in a toxic environment. Interestingly enough, some studies show that animal livers do not always have a higher concentration of toxins and heavy metals than muscle meat does; the levels can be variable.

Liver is an excellent source of protein, iron, vitamin A, and vitamins B12 and B2; in fact, its vitamin A levels could potentially be harmful if you eat too much. Liver is suitable as an occasional dish, maybe once or twice a month for the average person. See this article for more information and advice.

Upon researching how to cook liver, here are the top tips I learned:

If parasites are a concern, cook liver all the way through – it should not still be pink inside.

If the liver comes from an adult animal or if toughness is a concern, soak in milk for up to four hours before cooking.

liver 2

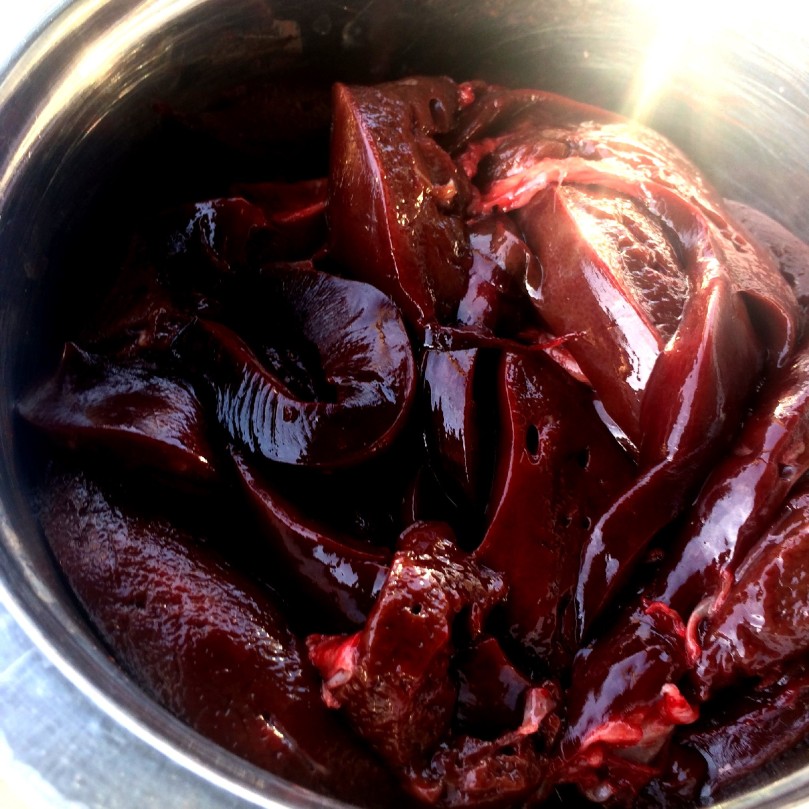
(Above: what we’re working with. You might be thinking that this liver is unusually large; in fact, my cutting board is unusually small!)

It’s recommended to peel off the thin outer membrane before slicing. Slice liver thinly so that it cooks quickly and evenly. Cut out any white tubes you may come across when cutting up the liver.

When cooking or frying liver, don’t move it around too much as it will either break or get tougher the more it’s moved during the process.

liver 3

(Above: sliced and ready to be cooked.)

I cooked liver and onions, which was really easy. Saute onions until soft or slightly caramelized (however you prefer). Remove the onions from the pan, add more oil into the pan if needed, and turn up the heat. Fry the thin slices of liver, about a minute on each side. Remove from the oil and combine the liver with the onions again. Season with salt and pepper to taste.

How easy was that? What are your favorite liver recipes?

You mean I don’t have to buy greens again? Forays into foraging

A few weeks ago I didn’t have a clue that there were edible weeds growing on our property. I came home one day and found Omari and one of our house painters preparing themselves a meal. I did a double-take at some small, bright green leaves in a bowl waiting to be cooked. “What… what are those?” I asked. The painter laughed. He had harvested them right off our property and was cooking them for lunch.

I had never tried to forage before, either in the States or here in Tanzania. I guess I was too scared I would accidentally poison myself and anyone else I had over for dinner. But once I learned about one edible green growing abundantly and freely on our property, I started getting interested in what else was growing out there, ripe for the taking. I can now identify five different local greens that can be cooked and eaten in various ways.

(Above: this amaranth plant has already put out seed heads.)

Those delicate leaves the painter cooked are called mchicha pori – wild amaranth. They grow rampantly in this part of Tanzania, where cultivated varieties are also grown. Both the seeds and leaves of amaranth have a wide variety of health benefits, having high levels of protein, iron, and vitamin A, among many other vitamins and minerals.

(Above: this purple amaranth is similar to the cultivated varieties here in Tanzania. This is a volunteer growing on our farm.)

Once you know what you’re looking for (and where you’ll be looking for it!), the actual collection process is pretty easy. This is what I did:

Snip off young, healthy-looking branches or leaves of the plant. Many wild greens (at least in my area) have a tendency to be bitter. The youngest growth will typically be the best-tasting. Also, don’t decimate one single plant; take a little from many different plants, if possible.

Once you’ve collected enough greens, remove the leaves from their stems if necessary. To “stretch” the greens, you may be able to peel or de-string the stems or stalks so that they cook quickly. But remember, you’re eating weeds. You’re getting something for nothing. So don’t make yourself crazy. If you just cook the leaves and throw out or compost the stems, that’s fine.

Rinse well in cold water and drain.

Saute or cook however you want. I saute onions and garlic in sunflower oil first, then add the greens and salt and pepper and cook until the water is all gone. Cook to taste; and if it tastes awful, remember, you didn’t buy those greens anyway! You can try again another day.

Disclaimer: I’m not an expert. I know what grows on my property, but not on yours. If you’ve never foraged before, please go with someone knowledgeable about the edible plants growing in your neck of the woods!

That being said…

How empowering does it feel to be able to walk out your door and into the backyard, alleyway, or fencerow, snip a few wild greens, and go back and cook them up for your next meal?! So cool. 

What can you forage for in your area, and how do you like to cook it?

Spilling the beans: harvesting and cooking beans, made simple

It’s hard to think of a food more universal than beans. The United States is the fifth largest producer of dry beans in the world, producing about 1.5 million metric tons in 2010. Tanzania is, incidentally, the seventh largest producer, producing about 1 million tons per year. From delicious burritos at the bus stop’s taco truck on the Pennsylvania turnpike, to experiencing beans on toast as a breakfast food in the UK, to being fed makande (a dish of beans cooked with cracked corn) in Tanzania, beans have been a part of the diet everywhere I’ve lived.

Nevertheless, cooking fresh beans can be intimidating, especially when harvesting and shelling them yourself. The beans we planted on our farm have been blighted by a range of pests, so I have been harvesting them little by little to cook most days, before the insects munch their way through every last pod.

If you’ve planted beans in your garden or farm, harvesting them before they completely dry is a great way to get fresh and delicious beans that cook faster than dry, stored beans. You can also keep shelled beans in the freezer… if you have a freezer….

beans 2

Harvest pods that have started to turn pale or dry out. If the pods are still as green as the plant (like the one on the left in the picture above), the beans have not firmed up enough and it will be a pain to shell them. You should be able to see or feel the beans through the shell, which should have started to turn pale green, yellow, or tan, and may have a papery feel to it.

beans 3

Don’t wait too long to harvest or the pods will shatter. Unless you want to be hunting around on the ground for your beans, make sure you catch the pods before they dry out completely and drop their beans to the ground. I (unwisely) planted several different types of beans all together, some of which evidently have matured much faster than others and have begun to shatter.

beans 4

“String” the beans from the stem end, along the outside of the curve. Then slide your thumb down the inside to push the beans out of the pod. I’ve found this is often the easiest way to do it. You’ll get into a rhythm once you start.

Rinse the beans in cold water. Strain them from any dirt or sand that may have dropped off the pods. Also throw out any wrinkly beans; all should be filled-out and smooth.

Bring to a boil in plenty of water, then simmer. Make sure the water doesn’t dry up – it sounds obvious but I can’t tell you how many times I’ve accidentally burned beans. The water will eventually get a reddish-tea look to it. The beans will turn wrinkly, then smooth again. The skins will start to look loose on some of them. Taste periodically until they are the consistency you prefer. The process usually takes less than two hours for me. (I also always make sure to cook my beans a little longer than I think they need; they get creamier the longer you cook them.)

At this point, you could let the beans cool, then store them in their stock in the fridge or freezer for later use. If I’m eating them right away, my favorite simple method is this:

-Chop up two or three small- to medium-sized onions for every two cups of cooked beans.
-Saute the onion in oil (I use sunflower but any cooking oil will work). Add a few cloves pressed garlic and cook a few minutes more.
-Add the beans along with the cooking water. Watch for hot oil splatters.
-Add chopped or grated carrot. One or two per two cups of beans is enough.
-Once carrots begin to soften, add one or two chopped or grated tomatoes (grating tomatoes?! Yes, they do that here in Tanzania).
-Add salt, pepper, and chili powder (if desired) to taste.
-Cook until the mixture thickens and turns creamy.

And that’s it! What do you do differently when cooking beans? What are your favorite bean recipes?