
Every day, I pile kitchen scraps and farm waste in the same spot. But there is no pile. Each time I take the compost out to the compost heap, the chickens make short work of spreading it around, after which it dries out and doesn’t actually compost at all. As compost is a very important part of improving soil and gardening, I clearly had to address the situation sooner or later.
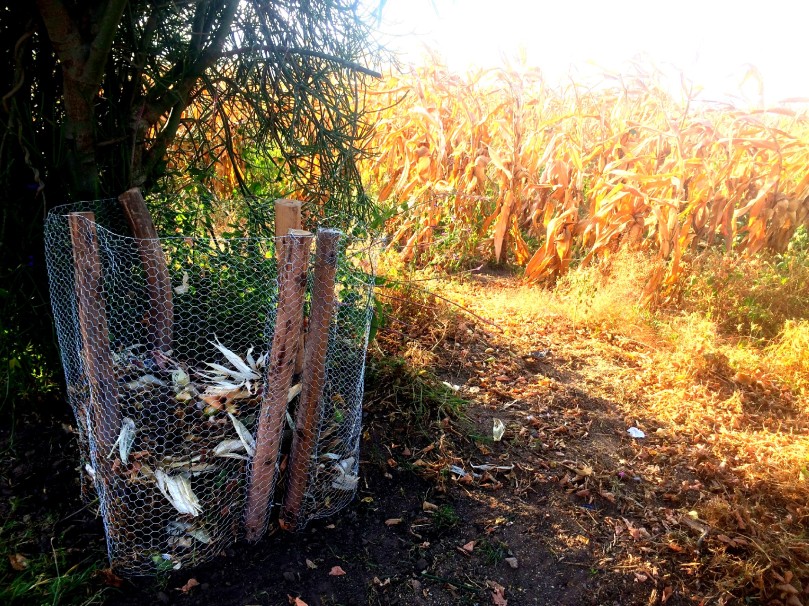
So today I addressed the situation. Most compost container designs are predominantly wooden or plastic, neither of which really work in my situation – wood is expensive and plastic deteriorates fast in this equatorial sun. Wire mesh seemed like a good option, so I based this compost container off of a design I saw in John Jeavons’ book “How to Grow More Vegetables.”
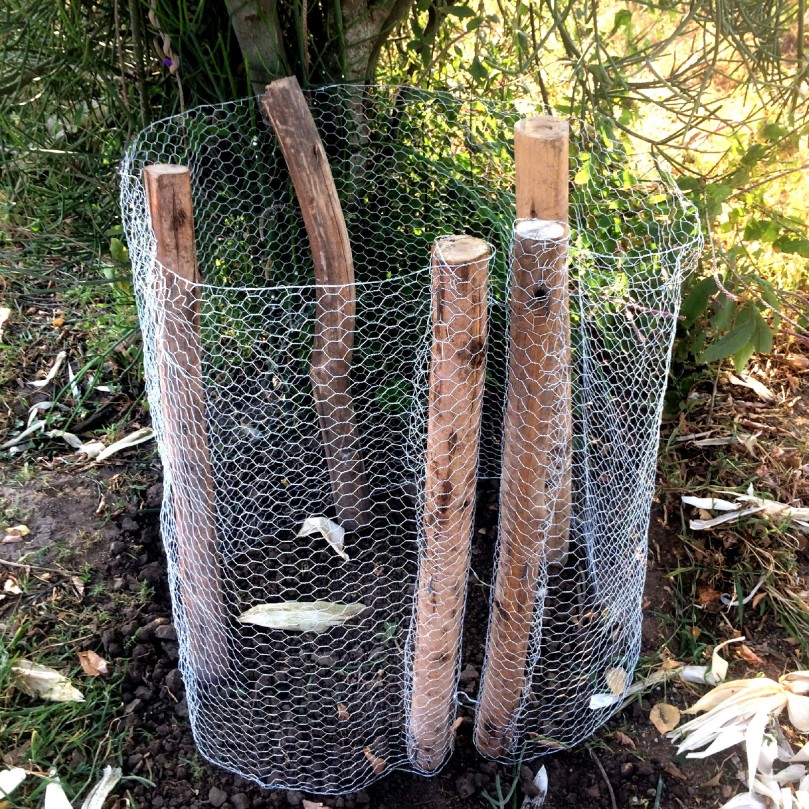
This container is great because it is cheap to make and it is easily movable, making turning a compost pile easy: once it fills, you can remove the wire, set it up again nearby, and turn the pile into the new location.
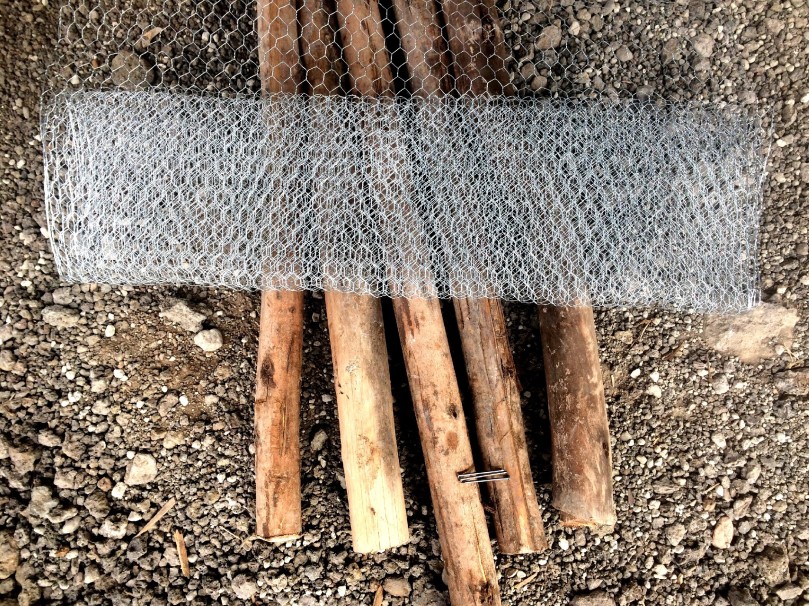
What you need:
- About 3 meters (or yards) of chicken wire or other metal mesh, with a width of 1 meter/ yard
- 5 pieces of wood (1x2s would work well; I used log-type wood I had), length of 1 meter or yard (however wide the mesh is)
- Small (2-inch) finishing-type nails; they should be easy to bend
- 2 metal latches (the kind with the swinging hook and eye)
- Hammer
- Saw (if you need to cut the wood to size)
How to put it together:
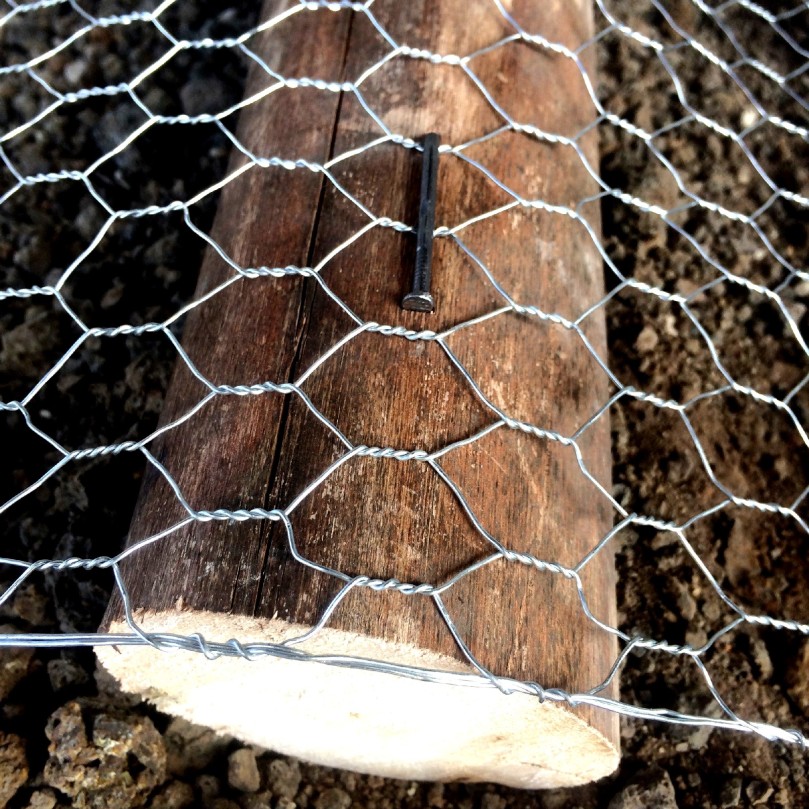
- Take each piece of wood and hammer several nails in a line down one side (the more the better, really; I probably didn’t use enough). Leave about an inch of each nail sticking out.
- Start with one end of the wire mesh and line the nails of one piece of wood up to pass through the mesh. I then curled the mesh around the wood and passed the nails through again.
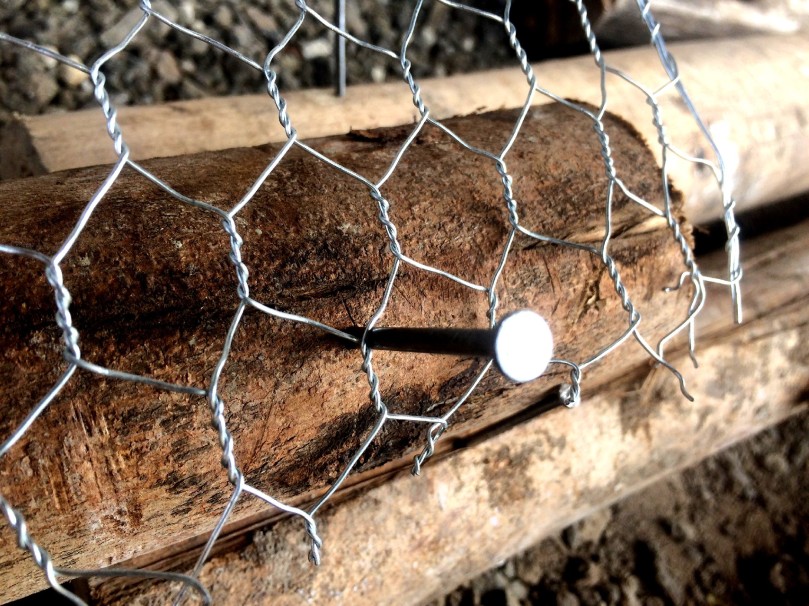
- Bend the nails with your hammer and hammer them down flat. They should face both up and down, not all in the same direction, so the wire doesn’t slip out if the nails start to lift up.
- Lay the length of mesh flat and repeat the above steps on the other end. If the mesh has been rolled up, I put the wood on the inside of the curve, because the wood will be standing inside the circular structure once finished.
- Eyeball where the halfway point and the quarters of the mesh are, and secure the pieces of wood on the inside of the mesh’s curve. Again, make the nails face in different directions, not all one way.
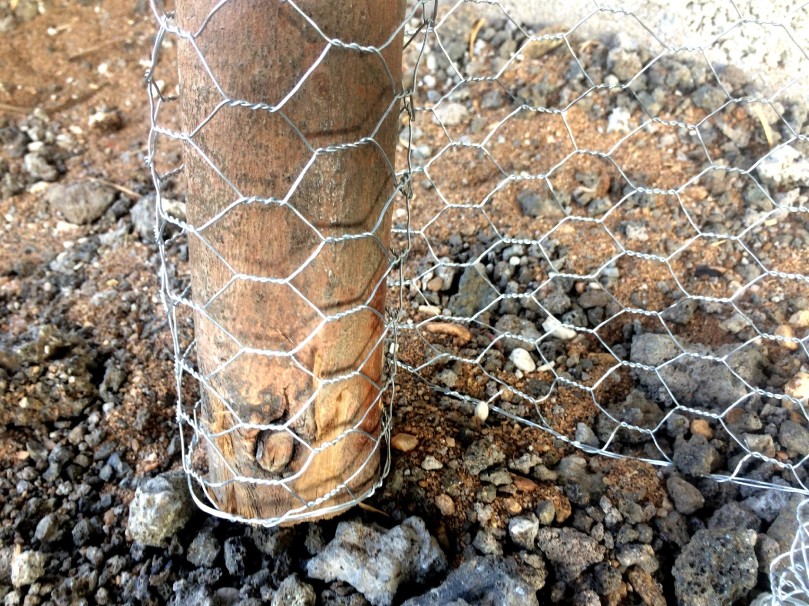
- Join up the end pieces and screw in the eye screws for the latch. If the wood is hard, ding a starter hole with an extra nail to get the screw to go in.
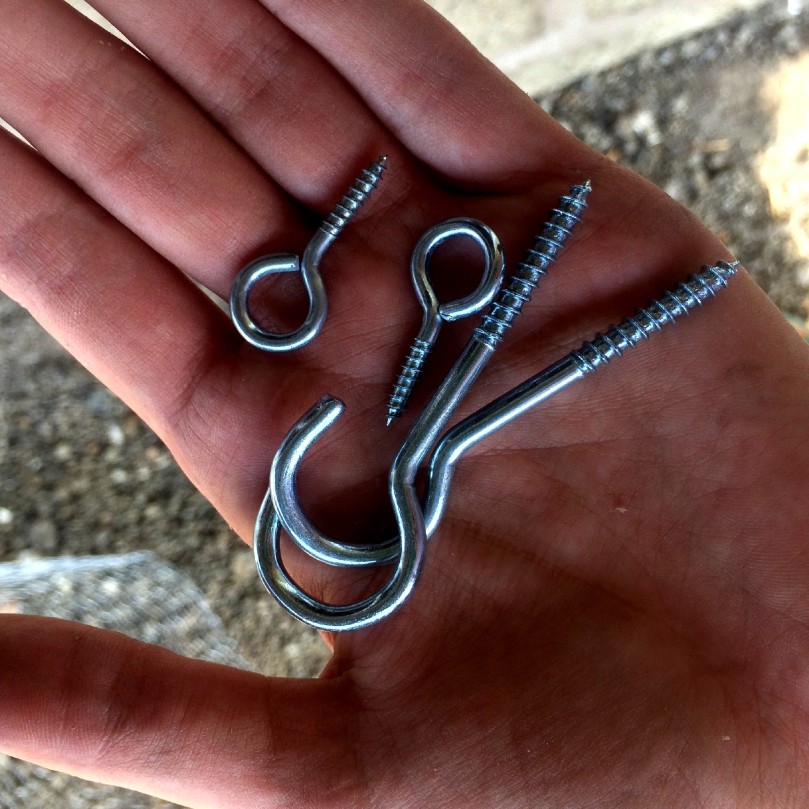
(Above: these are the hooks and eyes I ended up using because I couldn’t find the swinging-hook kind anywhere. The kind with the movable hook is ideal because it’s easier to open and close the container.)
- Decide where you’re going to set up the compost pile (if you haven’t already!) Clear the area from weeds and dig up the soil a little with a hoe or shovel.
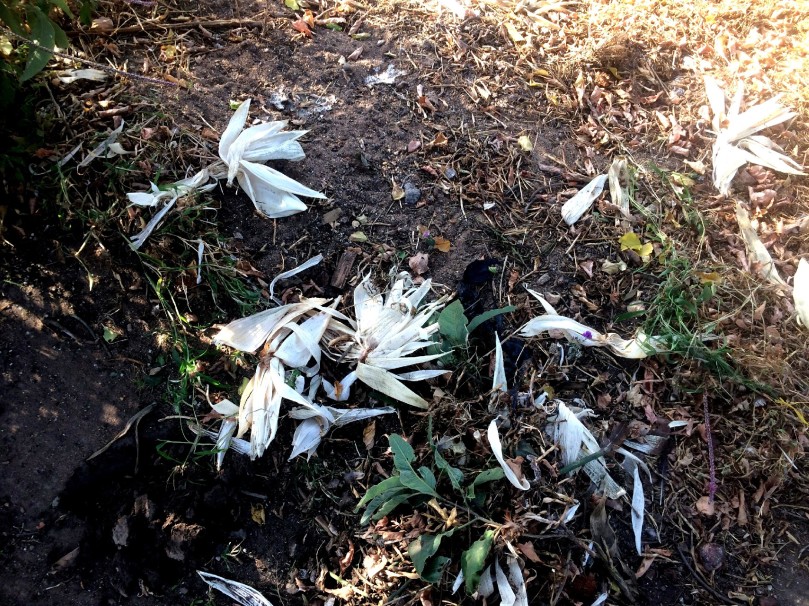
(Above: where my old compost pile supposedly was. Don’t see it? Neither do I. Darn chickens.)
- Set up the mesh container. It may be a little unsteady until it gets partially filled, like mine was. If this is a concern, you can brace the top with sticks or lengths of wood crosswise in the inside if you like.
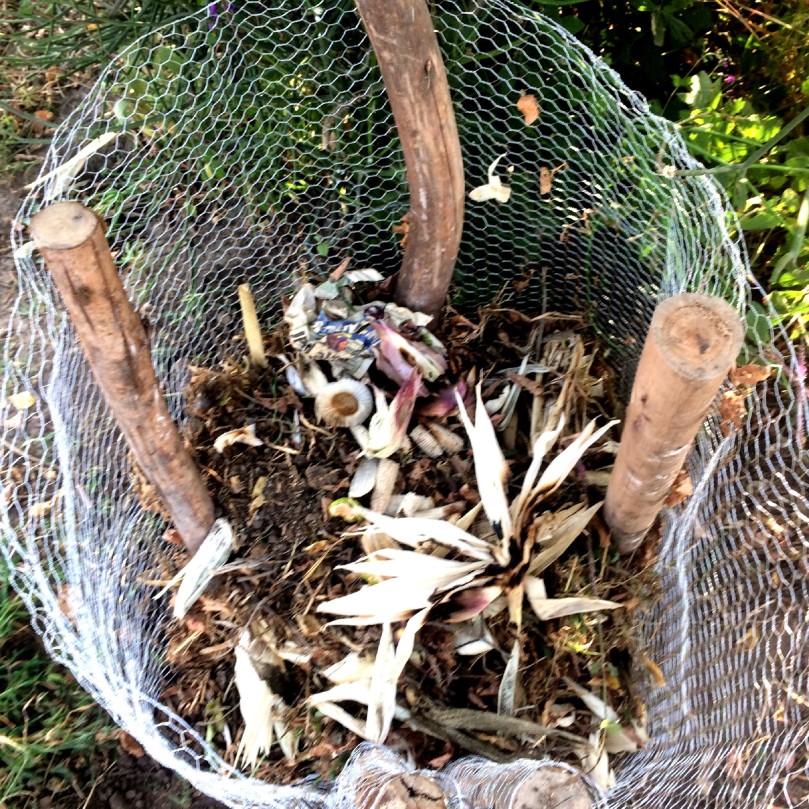
- I stood inside the mesh circle and straightened out the mesh with my foot, that worked pretty well, as it had been folded.
- Start filling your new compost container!
Some tips for composting:
- 1 cubic meter (or roughly 1 cubic yard) is the ideal size for a compost pile. A pile smaller than that cannot generate enough heat to decompose properly; larger and it may get too hot, or there is not enough surface area for it to respire properly.
- When adding anything that might attract flies, cover it with a layer of finished compost or garden soil that it is not exposed. This also helps to conserve moisture.
- Your compost pile may get hot, but don’t count on it to kill insect pests, microbes that cause plant diseases, or noxious weeds (such as Bermuda grass or wild morning glories). For those kinds of wastes, you can burn them in a pit and then compost their ashes, which do have beneficial minerals and nutrients.
Some other things not to compost:
- Leaves or cuttings from plants that have antimicrobial properties, such as eucalyptus or neem
- Feces from carnivorous animals like dogs and cats
- Meat and cooking oil (small amounts of oil or cooked meat is ok)
- Glossy paper or chemically-treated wood
That was pretty easy, wasn’t it?
What style of compost bin do you use? What techniques do you use for turning and finishing your compost?

We have a similar and even simpler one made with the more rigid wire cloth, like maybe for fencing? It is formed into a circle and the wires of the material bent to hold it together. The material,is rigid enough and the circumference big enough that it just stands up. Yours looks good! Hope the chickens don’t mind.
LikeLiked by 1 person
The chickens can deal haha. A lot of stuff in the compost they shouldn’t really be eating anyway! I can handpick out their favorite scraps like tomato ends when I’m cooking
LikeLike